While streaming services deliver music-listening convenience by the bucket load, there’s a lot to be said for taking the time to build your own digital music collection.
Whether meagre artist payouts or a desire for better sound are fuelling your move, or you simply find yourself forking out a monthly subscription for music you already have shoved in a loft somewhere, there are plenty of reasons that a digital music collection makes perfect sense.
But if the last time you built a digital music library was on an old iPod shuffle with some – ahem – questionably sourced MP3s, you may be wondering about how you go about doing it, what kit you’ll need and the ways you can listen. Thankfully, we’ve got you covered with our handy guide to getting your own digital music system up and running.
Why should you set up a digital music library?
This piece will be focusing on building a digital music library for at-home listening. If you’re looking to take it on the go, consider checking out our best portable music players buying guide for tips on where to start.
But why might you want to build one at home in the first place? Firstly, at-home digital music libraries offer a more permanent alternative to music streaming services. Once you have one set up, there are no additional fees to pay or ongoing monthly subscription, nor is there the chance that songs you love might simply disappear as licensing agreements change.
Not just that, but you can feel happy in the knowledge that you have supported the artists you love by doing exactly what most of them would want you to do, which is to buy – and not stream – their music.
It’s also a particularly good idea if you already have an extensive “owned” music collection already – be that a physical one in vinyl or CDs that you’d like to dig out of storage boxes and make use of, or digital files, bought, downloaded and stored, in the days when iTunes was king.
Of course, with high-res music all the more accessible now, it also opens up the opportunity for better audio quality and broader file choice, which will be important if you have a pricey hi-fi system you want to listen to it through.
What do I need to set up a digital library?
To get your digital music library off the ground, the first thing you’re going to need is a solid home network. The router you got from your internet service provider may well be perfectly adequate, but more important is the ability to hardwire your router to your new digital library. This will mean ensuring you have an available ethernet port and suitable cabling for its location.
The next thing to think about is how and where you will store all the music you want to listen to; just think of it as creating your own personal version of Spotify or Tidal to browse.
There are a couple of options for this, depending on how big your library is, or your budget for investing into it.
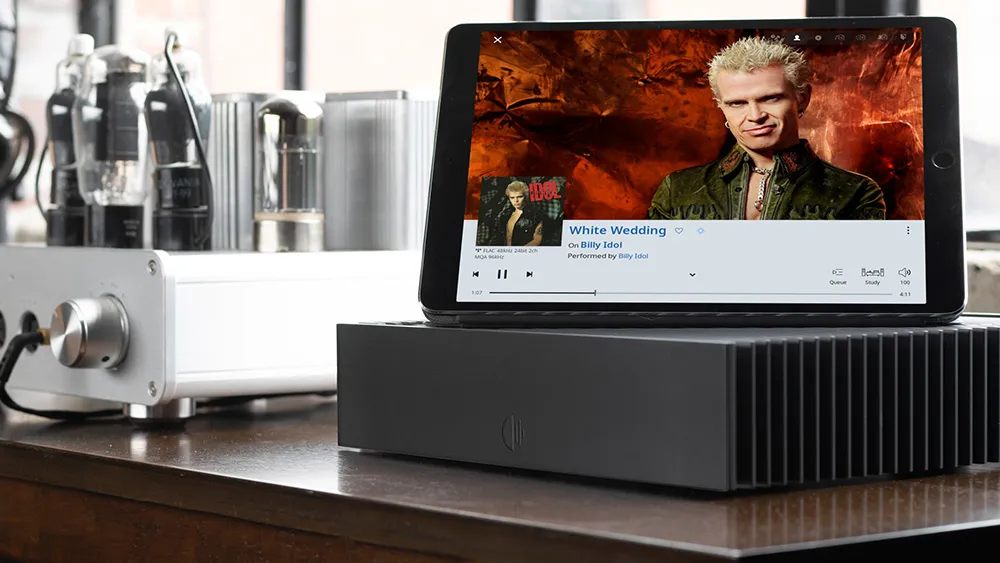
Music server
You can buy dedicated music servers from several brands including Naim, Bluesound, Melco, Innuous and Roon. This is usually one of the more expensive ways of creating your music library, but it is also among the most straightforward, as it will slot straight into any existing hi-fi system.
Generally, a music server is a combination of storage and streaming capabilities, and some may even include a CD drive, like the Bluesound Vault 2i or the Naim Uniti Core. This feature is handy for people with lots of CDs to digitise, as the server will rip and store them automatically, though of course you can do this separately by connecting an outboard CD drive if one isn’t included.
Music servers will usually have their own accompanying control app for organising and browsing your music too, and they’re usually pretty easy to use, which again helps to make the process all the more simple.
A music server is often thought to offer the very best sound quality for those with the budget, as it offers more audiophile-grade circuitry and components.
Network-attached storage drive (NAS)
A NAS drive is another popular solution for creating your own music library. However, unlike a music server, this acts purely as storage that can be found on your network.
It runs like a low-power computer and is always on, ensuring files are always available when you want them. Popular NAS storage brands include Synology, QNAP and Western Digital, thanks to their quiet running, reliability and expansion options.
The base price of a NAS drive often comes without storage, so do consider your budget for what you require. Retailers will often offer bundles to make this easier. You can choose between HDD (hard drive) or SSD (solid state drive) for your storage. An SSD has no moving parts so it is usually faster, quieter and more reliable, but it’s also more expensive.
Installing whichever you choose is usually straightforward enough too, as most NAS drives have trays for simply slotting these storage drives in – usually without any extra tools required.
As mentioned, a NAS drive will usually need pairing with a separate music streamer in a traditional hi-fi setup, though a multi-room system like Sonos will be able to find the NAS on your network and play its content back directly.
Other wireless speakers may also be able to playback your networked music library using AirPlay 2 depending on compatibility – you’ll just need the right control app to make that happen. Most NAS drives come with their own, but there are great third-party ones that offer more functionality and smarter organisation. Just remember that your source device must be connected to the same home wi-fi network as your NAS drive in order to find it.
Home computer
One of the cheapest ways of building your music library is on your computer.
Laptops aren’t the best choice for this, as you’ll need to leave it on at all times to be able to access your music whenever you want it. This always-on design is not something laptops were necessarily designed for – they can run quite warm and also have batteries that degrade over time – but it can work if you’re just dipping your toe in the digital music library waters.
A desktop computer is a better option, particularly because they are usually more flexible when it comes to additional storage, offer more ports for external drives, and run more efficiently than laptops do. You could even set up a Raspberry Pi to serve this purpose, with a little bit of know-how.
No matter how you decide to store your music library, don’t forget about backing it up. The last thing you want to do is put all this effort into building your own digital library and then lose it all to a hardware failure. It’s rare, but it happens. Look into auto backups which run regularly, as this will save you time and hassle and make sure you’re never caught short.
How to digitise your CDs

If you don’t have a music server with an integrated CD drive for easy automatic ripping, you’ll have to do it manually.
If your computer has a CD drive, you can use that, or you can attach an external CD drive that often connects over USB. Software like Exact Audio Copy or dBpoweramp will then automatically correct any errors that occur in the digitising process.
You can then connect to your music storage over your local network and store the ripped files there – unless you’re using your computer for that of course; then you can store it straight onto your desired hard drive.
Want to add to your collection with music downloads? Here are the best places to download high-res tracks.
How much storage do I need?
The storage you need will – surprise, surprise – depend on how much music you have and how you store it. If you have a lot of 24-bit/192kHz hi-res music files downloaded, they are going to need more space than files ripped from CDs due to their greater bitrate and therefore size.
The file format you rip your CDs to will have an impact on storage, too. Ripping them to MP3 will be one of the most space-efficient ways, but you won't get the best sound quality. You’ll want to choose FLAC, WAV or AIFF for the best results.
FLAC is the most popular format and would be our recommendation. It’s compressed but still lossless, so it gives a good balance between sound quality and file size. It also stores music metadata better than WAV or AIFF does.
WAV is the standard format in which all CDs are encoded. It also offers great sound quality, though as it is uncompressed file sizes are huge (especially when it comes to hi-res files). It has poor metadata support, too, which means no support for album artwork and hit-and-miss results when it comes to artist and song title information.
AIFF files are Apple’s take on WAV but generally offer better metadata support. They're still huge though, so FLAC is by far the preferable format.
As for how much storage you need, a full CD album of 70 minutes ripped to FLAC will take up around 420MB. Bear in mind that most music CDs aren’t that long, but allowing for that means you could store around 2380 albums per 1TB of storage.
That reduces significantly with high-res audio files. You should allow for around 33MB of storage per minute for 24-bit/96kHz files, or 66MB per minute for 24-bit/192kHz files.
If you consider the same 70-minute album as above, that means you can expect to store between 216 and 432 albums in that same 1TB drive.
Just don’t forget to double whatever you decide upon, for your backup – or consider cloud-based backups instead.
Organise your music

Once you have your music stored, you’re going to need a way to browse and access it. Your options may well depend on where you're storing it – if you’re running a Mac or Macbook, for example, it may well make sense to use Apple’s default Music software (or iTunes on older machines).
However, if you have DSD files, Apple’s software won’t support this natively. You can convert them, or you could look to alternative software like Audirvana or Roon (Mac/PC), though there is a fee for both of these – and Roon’s is ongoing. Free, slightly simpler options like Foobar2000 may do the job if you don’t want to fork out any more money.
As discussed before, music servers will usually have their own control apps for browsing and organising stored libraries, and these are usually pretty good. Sonos owners will be able to browse any music on the same network directly through the Sonos app too, once you have it set up.
NAS drives will often have their own software for browsing their contents, which will help you with playback too. Synology offers one of the better options, but you may still want to look to third-party software for the best experience.
Plexamp is by far the most sophisticated in this space, particularly for those who want to browse their catalogue across laptop and mobile devices. You simply load the Plex server app onto your NAS and then the Plexamp player app on your playback device(s) of choice.
Alternatives include Navidrome and Jellyfin, which are great for those who just want a more simple desktop interface – plus it’s free.
You're ready to go!
If you've followed the above, you should now be in good shape to start listening to your own digital music library, free from the ties of a monthly music subscription. Happy listening!
MORE:
What is high-resolution audio? And is hi-res music worth it?
MP3, AAC, WAV, FLAC: all the audio file formats explained
Best music streaming services: free streams to hi-res audio